


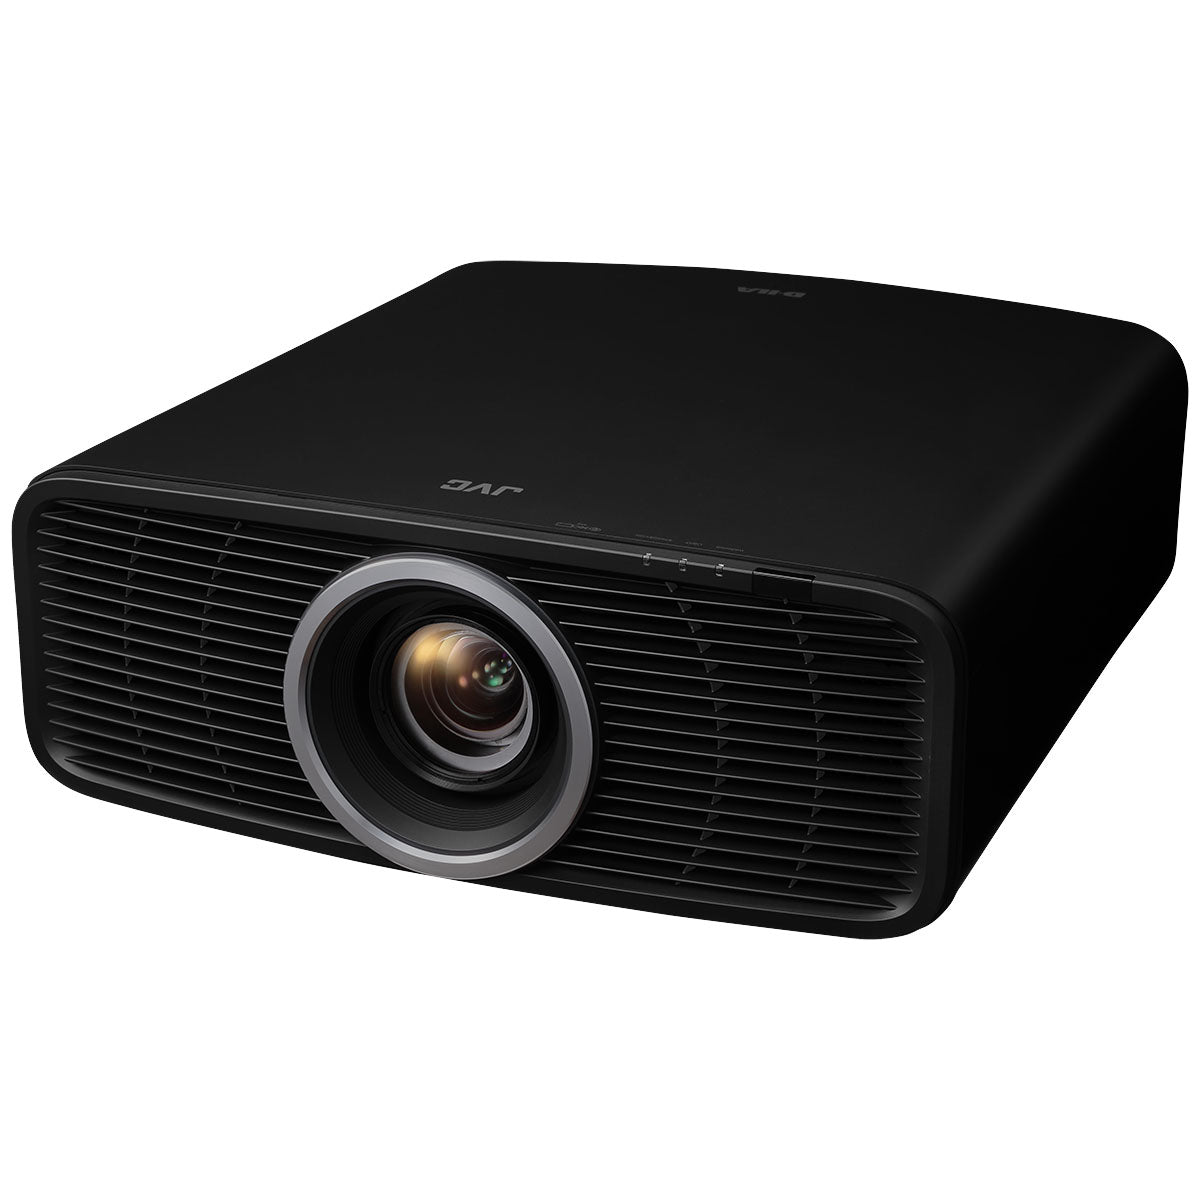
JVC NZ500 and NZ700 Laser Projector Overview

Company & Product Overview
When JVC introduced its D-ILA light engine in 1997, it became a serious contender in the front projection home theater world. D-ILA stands for Direct Drive Image Light Amplifier, and this technology has evolved over the last two decades. Most recently, we reviewed their new NZ800 and NZ900, which replaced the NZ8 and NZ9 projectors and feature third-generation 4K D-ILA chips. We can confidently say they are some of the very best home theater projectors on the market today at their respective price points.
However, JVC hasn’t released a replacement for the NZ7 until now with the NZ700. And one of the best features is that the new model is launching at the same exact price point as its predecessor! In addition, they’ve upgraded the previous NP5 lamp-based projector with the new NZ500. Both of these models feature some massive upgrades that we were really excited to put to the test in our home theater lab.
In this article, we’ll dive into what’s new about these two new projectors and then discuss the features and technology that they share. Then, we’ll discuss how they performed in our testing and give you some recommendations on whether one of these projectors would be a good fit for you.
By utilizing our home theater lab, we’ve spent hours testing and experimenting with these projectors to discover some tips and tricks that we send to every Audio Advice purchaser to make sure you have the best settings for the most optimal experience. And if you run into any setup or troubleshooting issues, our team of experts are here to help you!
NZ500 vs NZ700
These two projectors are extremely similar and only have a few differences between them. To view a full list of details and specifications, follow the links below.
Key differences:
- NZ500 = 2000 lumens, NZ700 = 2300 lumens
- NZ500 = 40:000:1 native contrast ratio, NZ700 = 80,000:1 native contrast ratio
- NZ500 = 93% DCI-P3 color gamut, NZ700 = 98% DCI-P3 color gamut capable (must enable cinema filter to achieve this, which will drop light output around 25%)
Features & Technology the New Models Share
Build Quality
The first thing you’ll notice about these new projectors is that they are not in the same chassis as the previous NZ models or the new NZ800/NZ900. In fact, the chassis of the new NZ500/NZ700 has been completely redesigned with a new casing, making it the world's smallest 4K D-ILA projector today. The new chassis measures approximately 18” wide, 7” tall, and 19” deep, whereas the NZ7, NZ800, and NZ900 models with the larger chassis are approximately 20” wide, 9” tall, and 20” deep. This is around a 35% reduction in volume!
JVC has also moved the exhaust fans to pull in cool air from the front and push the warm air out the back, which is opposite of the NZ800/NZ900. This is something to consider if you will be placing your projector in a small enclosure because you will need to plan to have plenty of open space and airflow in the back of the projector, where it will exhaust the warm air. In our testing, we were very impressed with just how quiet the fans were on both models, even as we cycled through different brightness settings.
We also noticed that these projectors are slightly lighter, at just over 30 lbs. And while these new models are built like tanks, just like all JVC projectors, if you’re going to mount this projector, we still recommend having a friend help you out.
Plus, JVC stands behind its build quality with a 3-year warranty and a 1-year advanced replacement warranty, which is pretty incredible.
Throw Distance & Lens Shift
These new models do have a shorter zoom of 1.6x compared to the 2.0x zoom in the NZ800/NZ900. This means you will be a bit more limited when it comes to how far back in your room you will be able to place the projector to get a large, bright image. Plus, the lens shift function will give you a 70% vertical and 28% horizontal range. This is slightly less than the NZ800 and quite a bit less than the NZ900.
However, you really don’t need to worry about doing any calculations to figure out where to place any of these projectors. You can simply use our projector throw distance tool and plug in your screen size and any of these JVC models to see how bright your image will be depending on how far back in your room you place it. Then, if you need to use the lens shift, you can see the maximum vertical and horizontal shift each projector is capable of. The tool will do all the calculations for you and will give you the exact measurements for your installation. It truly takes all the guesswork out of the process and is the best way to compare and contrast any of these models.
Motorized Lens Support
Perhaps one of the most exciting features for us is that these two new projectors have fully motorized lenses with lens memory so that you can get an amazing widescreen movie-watching experience. With 85% of blockbuster movies being filmed in widescreen, it is the best way to enjoy content the way the director intended. Both of these projectors can be set up to give you standard 16:9 HDTV ratio content and a wider aspect ratio of 2.40 with just the push of a button. You can even program up to 5 different lens memory positions to match whatever content you’re watching.
JVC also makes these models perfectly compatible with the aftermarket Panamorph lens for an even better widescreen experience. If you want to learn more about widescreen or Panamorph lenses, check out our Widescreen Explained article, which details how widescreen works, the differences in various aspect ratios, and has info on how Panamorph lenses can improve your widescreen experience when added to your projector.
Gen3, Native 4K D-ILA Devices & BLU-Escent Laser
The D-ILA device is the heart of these projectors and plays an essential role in making the image the best it can be. The NZ700 is updated with the new third-generation 0.69” D-ILA devices, the exact same devices found in the more expensive NZ800/NZ900 models.
Now, we should point out that even though they do use the D-ILA chips throughout the lineup, they aren’t really the same from a performance standpoint. When we talked to the JVC engineers years ago when we first became a dealer, they told us an interesting fact. Since these are made on such a tiny scale, there is unit-to-unit variability in the chips. JVC actually tests each and every chip and then grades them. Some get thrown out, as they don’t pass their stringent requirements. However, the higher-performing chips will be used in the higher-end units. So even though it is the same chip, as you move up in the line, you get better contrast and color.
Both of these new models also feature JVC’s newly optimized BLU-Escent Laser light source, which can last up to 20,000 hours at its highest laser setting! That figure will increase to, say, 30,000 or 40,000 hours if you aren’t using its brightest setting at all times. JVC offers a 101-step laser light control to adjust the laser brightness to your ideal level. The laser light engine is an essential component of a projector, and JVC has optimized it to achieve higher peak brightness levels, greater efficiency, and a quieter operation than the older models.
We want to emphasize how big of a leap in technology and performance this is, especially going from the entry-level NP5 to the NZ500. A native 4K device means you get true 4K on your screen and the brightness and longevity that a laser engine provides. We are thrilled to see this in both new models!
HDR (High Dynamic Range) and HDR10+ Support
JVC projectors have always been known for their brilliant color and detail. You have likely seen the term “HDR,” which stands for high dynamic range. This technology enables studios to master content with a high dynamic range. HDR10 tech allows them to embed metadata into the video feed, which instructs your TV or projector on how to reproduce the signal for brighter whites, deeper and more contrast-rich blacks, and many more variations of colors.
However, HDR content is designed for display devices like flat panel televisions that can achieve light output from a few hundred nits all the way up to a few thousand nits. One nit is equal to one candela, or one candlepower, per square meter. It is essentially the brightness per unit area. The catch is that most home theater projectors can only produce 100-200 Nits. This gap caused projector manufacturers to devise a better way to interpret the HDR10 data to deliver a great image on a front projection system. To combat this, JVC has included its Second Generation Frame Adapt HDR. They took this already incredible process of analyzing the signal frame by frame or scene by scene and reexamined it to achieve an HDR image with high definition. Plus, their proprietary algorithm for tone curve selection has been improved to reproduce HDR images that are brighter, more colorful, and have a wider dynamic range.
In addition to standard HDR10, the new NZ500 and NZ700 support HDR10+. We are seeing more and more Blu-ray discs and streaming content deploy HDR10+, which also embeds the luminance information for each scene in the metadata rather than just an average for the entire movie like HDR10. This lets the system get even closer to the HDR image the producer intended us to see.

Deep Black Tone Control, DML, Filmmaker & Vivid Modes
A few more modes that were introduced in the NZ800/NZ900 are also trickled down to the new models, which we will go over now.
The Deep Black Tone Control, DML (Display Mastering Luminance), Filmmaker Mode, and “Vivid” Picture Mode are in each model. The Deep Black Tone Control actively subdues tones in dark areas for more realistic darkness and maximizes the dynamic range so that scenes with light and dark shades can be projected with even greater realism. The DML adjusts and sets the dynamic range to match the image for improved HDR tone mapping. The Filmmaker mode, which was developed by the UHD Alliance, gives you the ability to recreate an image that is more faithful to the look that the director intended you to see. It does this by turning off frame interpolation and noise reduction and setting the color temperature to 6500K, which is a standard in the industry.
Finally, JVC’s new picture mode, which was introduced in the NZ800/NZ900, “Vivid,” is in these models as well. It’s excellent for SDR animated content with a more narrow dynamic range. This mode will allow that content to shine with greater vividness and more saturated colors. When you combine these modes with the new second-generation Frame Adapt HDR, these new projectors give you deeper blacks and allow you to project the very best of what each source has to offer.
Now, in case this all sounds very technical, for you to get the best results, you only need to do one thing. We go over this in our exclusive tips and tricks guide we send to you if you get your JVC projector from Audio Advice. You want to tell the projector the picture mode it should engage when it sees SDR, regular HD content and the mode for HDR content. Then, it all just happens automatically based on the incoming signal. There is no need to adjust things on the fly based on the type of signal.
New Lens Systems
If you know anything about photography or cinematography, you know how important a lens is when it comes to capturing beautiful, sharp images. The same holds true for projectors. JVC has implemented world-class lenses into the NZ800 and NZ900. However, if you have ever bought a high-end camera, you know that the lenses can cost just as much as the camera itself! So, to keep the cost lower, JVC has trickled down their lens technology but uses a smaller, more affordable lens in the NZ500 and NZ700.
Both projectors feature an 80mm lens with 15 elements and 11 groups of glass. This ensures a sharp 4K image from corner to corner.
For reference, the NZ800 features a 65mm, 17-element, 15-group all-glass lens, and the NZ900 steps up to a 100mm HQ lens system with an 18-element, 16-group all-glass lens and five special low dispersion lenses.
Gaming
Both projectors are equipped with two 32Gbps HDMI 2.1 inputs with HDCP 2.3, which enables them to playback 4K/60p source. This allows you to play games at 4K/60p with low latency, which will make gameplay pretty smooth if you have the latest Xbox, Playstation, or gaming PC. In our testing, both projectors handled casual gaming well.
However, we missed the 120fps that are available in the NZ800/NZ900 and even the NP5. We know the most serious gamers won’t be using a projector to game on anyway, but if gaming is extremely important to you and you want upgraded gaming performance and have a console capable of 120fps, we’d recommend stepping up to the higher models will give you a much smoother gaming experience. Or, if you want to save some serious bucks, you can go for the previous NP5, now at an even lower price. But before you do that, we’d recommend chatting or calling our experts to be sure that would be the best choice for you, as you will miss out on some of the latest technology.
Setup & Calibration
The menus on the new NZ500 and NZ700 are different from those of the other models in the lineup. It did take us a little bit of time to learn them as they are very extensive, with some very deep-level settings for adjusting and calibrating the picture for those who want to really dive in and make customizations. JVC has even included a fully adjustable slider for the laser light levels from 0 to 100, like you see in the NZ800 and NZ900, instead of low, medium, and high, like in the previous models. This gives you even greater control over fine-tuning your image to your liking. However, the great news is that most of the default settings are exactly where you want to leave them. But if you purchase from Audio Advice, you not only get our experts to help you fine-tune your system, but you also get our exclusive tips and tricks setup guide that walks you through the very best settings and how to get to each of them.
If you are an expert or want to experiment, JVC does give you a 6-axis color management system to adjust the hue, saturation, and intensity of 6 different colors for ultra fine-tuning your system. Plus, you can also utilize their auto-calibration function with a great piece of free software from JVC. You do have to purchase an optical meter for around $200 and up (the Spyder X is a good value unit), but with a laptop, their software, and a meter, you can get extremely close to what would cost you several hundred dollars from a professional calibrator. And it's all automatic!
We will add that you do miss out on the great Home Theater Optimizer feature that is found on the NZ800/NZ900 models. That feature lets you plug in your screen gain and size and then optimizes the image based on the environment you’re in. Although you can utilize the Screen Adjustment Mode on the NZ500/NZ700, which lets you look up your screen on their website and plug in a custom code to allow the projector to optimize its color based on the exact screen material you’re using but there is not a way to enter your screen size like you find in the NZ800 and NZ900. We will also note that neither of these models will support 3D, like the NZ800 or NZ900. However, as we find more and more people not using 3D as much, we think this is a great trade-off and a good way to keep the price down on these models.
Audio Advice Tip: *If you need some design help finding the best-sized screen for your room, please check out our free home theater designer. You can lay out your room and find out what size screen will give you the immersion level you desire for your seating position. Then, you can work with our home theater experts to find the right projector for that screen size. *
Performance Testing
JVC sent us the new NZ500 and NZ700 for testing. We utilized one of our home theater testing labs to put them through their paces. A few features we want to point out are that the NZ800 and NZ900 models are the only ones that get the 8K/e-ShiftX technology to upscale content to 8K. Plus, the Clear Motion Drive technology (frame interpolation) is available with high and low options, but it’s only black frame insertion, which isn’t the same as the previous versions and currently only works on 60 Hz content. For our testing, we decided to keep this turned off as we found it was more distracting than helpful, and the native motion in images from both models was pretty darn good without it on.
For our testing, we utilized a BluRay player and a Kaleidescape to test a few different movies and test patterns with each projector. Both models had beautiful, sharp images that handled the highlights extremely well and gave us some really good deep blacks. By experimenting with different settings and running through our tests, as we do with every projector that we measure and assess, we were able to narrow down the very best settings for each mode that we think would be best for the majority of users. We run through all of these settings and more in our tips and tricks setup guide that we send to all Audio Advice purchasers so you can get up and running quickly with a great image.
What really impressed us was how good the contrast was in HDR and SDR content. While the brightness between these models was negligible to the naked eye, the contrast was absolutely outstanding on the NZ700. On both models, colors seemed to really pop and create a very realistic image with great dynamic range. Even in very dark scenes, the blacks were very dark compared to the older models, and the highlights weren’t overexposed, providing a really incredible picture.
Compared to the NZ800 and NZ900, these projectors were pretty darn good for a lower price. However, when you compare side by side, it’s pretty clear that the higher-end models give you an overall better image in just about every single way. They have better contrast, better detail, and more features that allow you to have more flexibility in where you need to place your projector. However, the NZ500 and NZ700 absolutely have a place in this lineup, and we think they will fit the bill for so many people. We are thrilled to see just how good JVC has made these new models at the price points they are at, giving a really solid home theater performance to many more people.
Overall Recommendation
Now, a lot of people will be wondering if they should upgrade from their current projector model to one of these new models. While the answer to that question will most likely be better served with a more in-depth discussion with one of our experts, we can give you some general thoughts on when we think these models are worth upgrading to.
If you’re looking to step up from the NP5 or NZ7 models, we can confidently say these will be worth the upgrade if you’re looking for more brightness and better contrast in your images. If you currently have the NZ8 or NZ9, we think moving to the NZ800 or NZ900 makes more sense rather than stepping down to the NZ700.
In addition, while these JVC projectors do a phenomenal job on their own, if you want to boost the performance even more, we’d recommend you consider adding a madVR Envy to your system. If you don’t know what a madVR Envy video processor is, check out our full article on their Extreme version and their new, more affordable Core version. These are the best video processors in the world and can bring your projector to a whole new level. However, when we utilized the madVR Envy Core with the NZ500 and NZ700, the performance was extremely good, and it is a combo that is outstanding for the total price.
If you’re deciding between the NZ500 and NZ700, it will probably come down to how big of a screen you have and how far away you plan to place your projector. Our experts have measured the brightness of all of these projectors in a real-world environment to give you more accurate results and allow you to see the difference in brightness (nits) when you place them in your room. When you plug in your room dimensions, projector location, screen size, and more, you can be sure you are getting the best option that will have enough brightness to display HDR content and fill your screen with a vibrant image.
In addition, our home theater design tool and projector distance calculator allow you to compare and contrast all major projector models to each other. And if you purchase your JVC projector from Audio Advice, we will include our tips and tricks guide.
We’re here to help!
If you have further questions, contact our experts via chat, phone, or email. Or simply visit one of our world-class showrooms to experience speakers, projectors, TVs, and everything in between for yourself before you make a purchase!
If you’re planning your home theater or media room, check out our Home Theater Design page, where we have everything Home Theater related, including our FREE Home Theater Design Tool.
When you buy from Audio Advice, you’re buying from a trusted seller since 1978. We offer Free Shipping, Lifetime Expert Support, and our Price Guarantee. We look forward to serving you!